Pages

Sunday 2 June 2013

Bird house

Do you ever get an idea in your head that just wont budge till you make it?  This was one of those makes.

Late warning.  There are lots of pictures.


The bird house measures approx 6x6x6 inches and is made from 480 gsm card stock.  I have drawn out a cutting guide as I will doing a live tutorial on how to make this soon.


The hardest part for me to work out was the roof strangely enough.  The best part was decorating it.


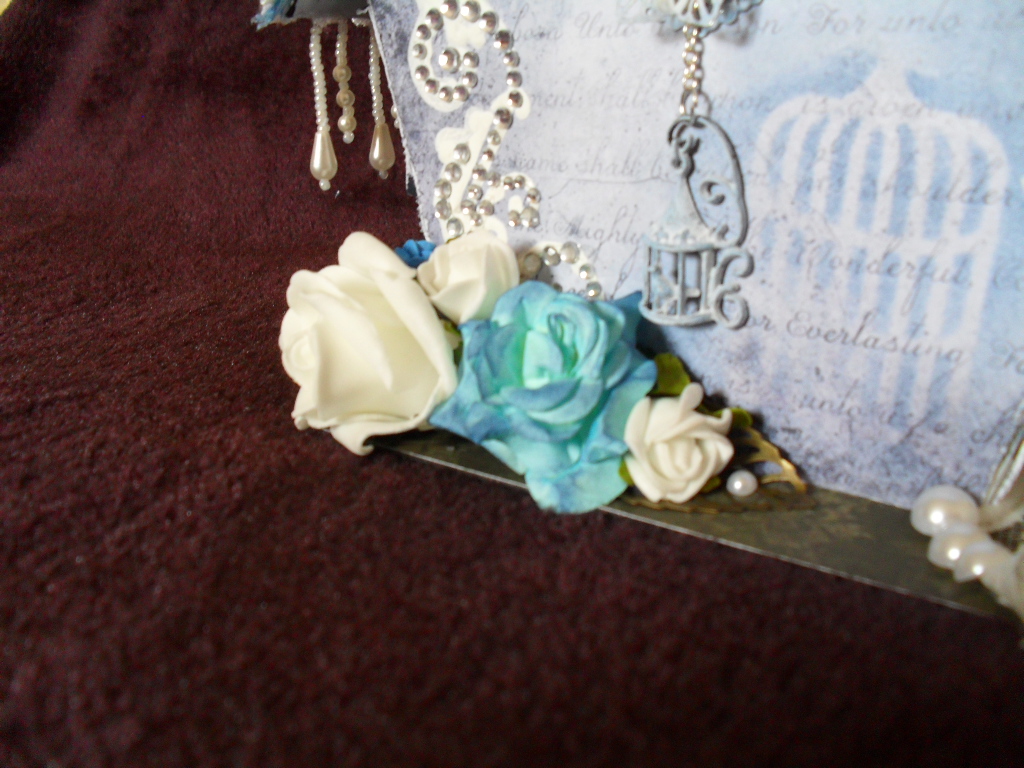
I have stencilled, texture pasted, dyed flowers and generally had a lot of fun with this.


I couldn't resist adding more flowers to the roof.  I felt it needed a chimney, but preferred the flower cluster.


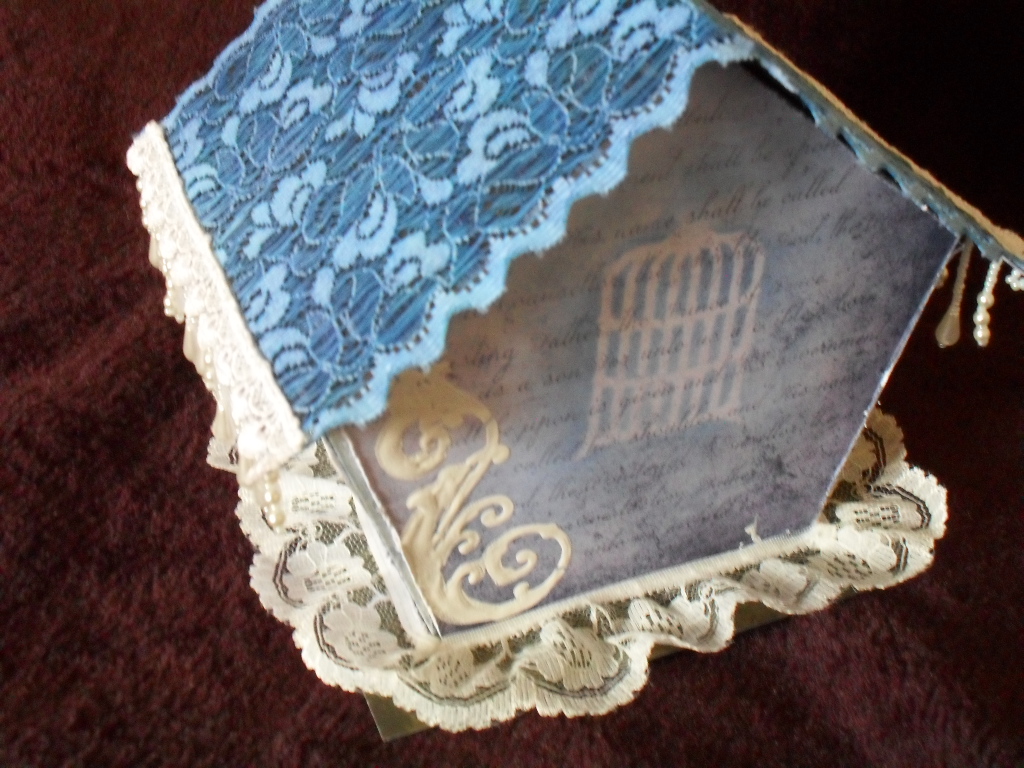
I did cover the base, but then added lace for a bit more femininity.


I plan to make a mini album to go inside the house, but I just couldn't wait to show it off.

I am entering my Bird House for the mixed media challenge over at Seemacrafts

Sunday 5 May 2013

Owlie

Hi,

I have joined a few crafting groups on Facebook in an effort to get me crafting more and to be able to swap ideas.

This is something I made for two of the challenges in the groups.


This started life as a page from a 7 gypsies tag book that I have had for a couple of years and didn't know how to use.  I had originally tried to cut it down to 6 inches using my guillotine and messed  it up.  Who knew that it wouldn't cut chipboard.  I wont be trying that again.  Any way, I couldn't use it for that project and made this instead.


The background started life as a piece of white card stock, which I inked and masked using distress inks.  I also went around the edges with some mica powder to add a bit of sparkle and a slightly distressed look. (Looks better in real life.)  Every thing else came from my stash.  I'm trying not to hoard and any more, so bits I have been saving are starting to come out.

I really need to craft and blog more.

Any way, happy crafting xx 

Saturday 20 April 2013

Wallet albums

Hi.  I haven;t been crafting as much of late.  My plans for opening my own craft shop have slowed down and my mojo went some where sunny to relax.

Last year I made a wallet mini and I have been meaning to make another.  I finally got around to it this week and immediately got asked by my son to make him one.


This is the original one that I made using a tutorial by Charliejones2686 on Youtube.


This is the one I finished earlier this week.  It's hard to show these properly in pictures because of the size and the number of flaps to open and display.

My sons favourite colours are black and purple, so I have started making his using black card.  I am going to make his pages white and distress/grunge them with black and purple.  The odd bit of silver might get added here and there. I'm hoping to finish it by tomorrow, so I will blog it when it is done.

Catch up with you soon (I need to blog more often)

Naomi x

Tuesday 5 March 2013

Smile Often

A friend of mine gave me two of these canvases and I sat starting at them for ages.


Then I started watching Youtube and came across what I now refer to as "Full up" canvases such as Luvleescrappin  and Finnabair make (The links will take you to Youtube)


This is a picture of my daughter from years ago.  I created some texture using a couple of stencils and texture paste.  When the texture paste was dry I started adding the other elements.  After sticking everything down I covered the picture with a coating of matt gesso and the rest of the canvas with gesso.  I then sprayed with mica mists.  I went over some of the elements with watered down vintage photo distress ink re-inker to add definition.  I added some blue embossing powder to the peacock and butterfly

The great thing about doing a canvas is that if you don't like a little bit you can gesso it and recolour.

I am entering my canvas for the WINGS challenge over at Crafty-emblies as I have used a number of their lovely embellishments on this. 

Saturday 16 February 2013

New challenge.

This year I am determined to be more in control of my destiny. I am currently working on a business plan that will hopefully allow me to open my own shop.  I plan to sell crafting goods suitable for card making, scrapbooking, mini album making and altered crafts.

I will run classes in all of the above and hopefully at some point set up a website that I can sell from.  2013 is going to be MY year :D

Monday 28 January 2013

2013

I'm determined to push myself with my crafting this year.  I tried out a number of different skills last year, but didn't take the time to think them through properly or to perfect them.  This year will be my year to improve on what I do.  For the most part, I think this will mean more time planning.  I love to play and explore, but I wasted a lot of stash (and money) last year and I can't afford to do that any more.

I have found new inspiration though groups that I have joined online and via blogs and Youtube.  I haven't really been using my blog very much and as a result, I have missed out on some great posts and ideas that are out there. YouTube
Mixed media excites me. I can't draw, but I recently bought a sketch book.  I'm hoping to try art journaling with that.  I'm loving working on canvas, but that needs a major amount of work as what I am producing at the moment is very amateurish. I have discovered  Jim and have been so inspired by the 3D pieces that he produces.  I'm hoping that my imagination can take me further than it ever has before and that one day I will be able to produce pieces along the lines of what he has made.

I'm learning to take lots of pictures so that I can recreate ideas with less going wrong, so expect to see a lot of that going on.

I'm off to do dinner and then have a crafty play time 

x

Friday 9 November 2012

Such a long time

It has been ages since I have posted anything on here.  I have been busy doing stuff in RL, but I have found time to do a fair bit of crafting.

I have finally put he handle on this one.  I'm so pleased with how it turned out.


This started life as a pale wooden (pine I think) tea box that I bought on eBay.  I started off by staining it using Tea Dye distress stain.  Tea dye is my favourite colour in the distress range.  It gets used on almost every thing.

I then stamped it all over using vintage photo distress ink and a Tim Holtz script stamp.


I seen to have a thing about time lately.  Lots of cogs and clocks appearing on everything.  I love any thing that smacks of steampunk (NOT just sticking a cog on it) so I had a dig through my collection of steampunk charms and embellies.


I have added a few stamped clocks using brushed corduroy   The cogs and clocks where coloured using tea dye, vintage photo, aged mahogany and a bit of bronze acrylic paint.


A friend of mine gave me some stamped images.  This heart seemed to beg to go here.  It covered the seam of the box, so I had fun with a scalpel cutting it so that the box would still open.

I have another three projects on the go, so hopefully I will be posting again soon.

Happy crafting every one.

Related Posts Plugin for WordPress, Blogger...