Pages

Showing posts with label red. Show all posts

Saturday, 12 November 2011

Flutteby Red

It has been a week or two since my last post as life has taken over my little bit of crafty time.  Luckily, I have been able to do a bit over the last two days.  I have a list of Christmas cards that I am making  along with presents for family members.  There just are not enough crafting hours in the day.  This little wooden box was made for fun, so no pressure :-)


I love doing these trinket boxes.  Exploring the possibilities of what I can do with them and what new techniques I can try.


This one is hand stamped using tea dye distress ink on the top and the tag.  I bought the fairy writing stamp a while a go for a project that I haven't gotten around to starting yet, so this is the first time I have used it.  I have also used the tea dye ink around the sides to add colour and heat set it.  The butterflies are embossed with gold embossing powder and I have added some 2mm gems.  This is the first time that I have tried using a tag on one of my trinket boxes and I am very pleased with the result.

I am entering my box  for the following challenges:-

Craft Your Passion - Anything goes + Brown
Kaboodle Doodles - Fall colours
The Crazy Challenge - Something with wings


Monday, 3 October 2011

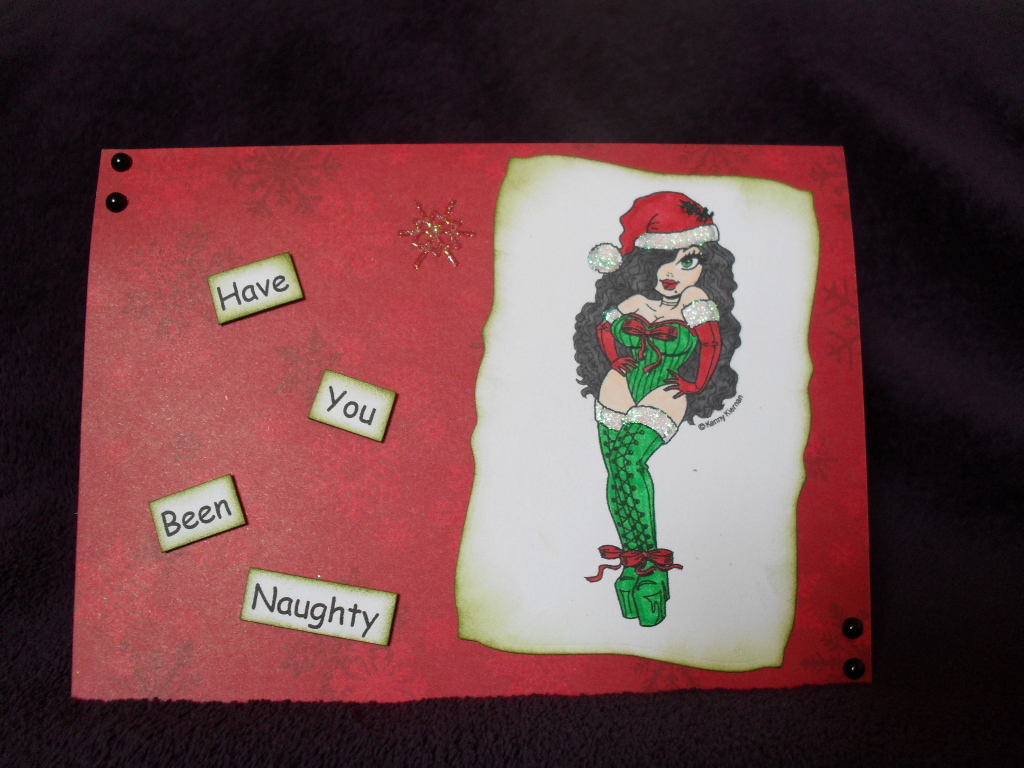
Naughty or nice

I find making card s for men really hard.  I really have to think about them.  Can't go too crazy with flowers, don't want to over do it with the ribbon and just how much is too much on the embellishments?

Kenny K's Krafty girlz challenged us to use two or more girls on our card this week and to use die cuts.  This card instantly popped into my head.  Well if you see the Christmas images available it just made good sense.


I had the "Santa Claus is coming to town" tune going around in my head when I was looking through the digis that I have.  I have promised myself that I would make more effort to make more Christmas cards now and not leave it till the last minute panic I had last year for people I had forgotten.


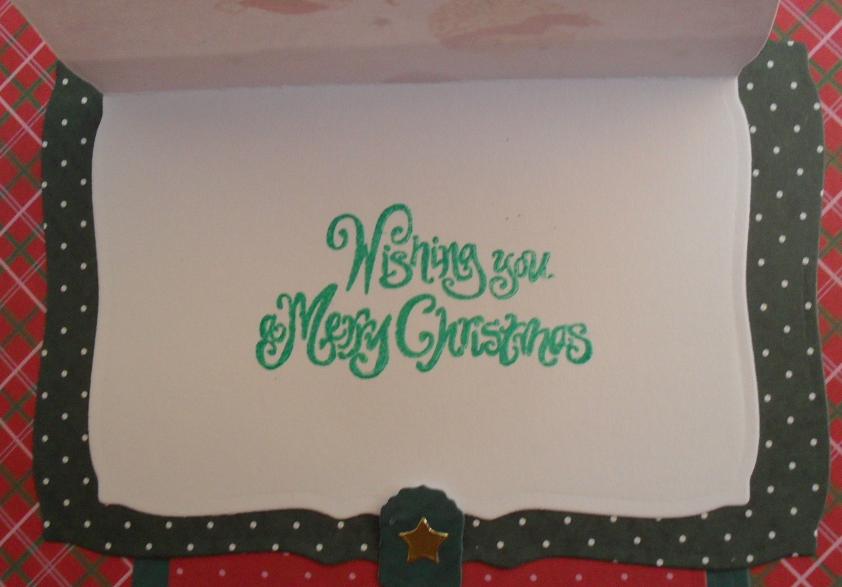
This is inside the card.  ll of the working was attached using foam pads to give them a bit of height.  I have edged the different elements with peeled paint distress ink and all of the fur trim bits have been glitter glued in clear iridescent.  

I will also be entering this card for the challenges at :-
The Crafty Pad - One for the boys

Sunday, 4 September 2011

Xmas Folds

I have finally started making stuff for Christmas.  This is my first project.  I think I have been in denial for the last month or so, but I know that if I don't start now, I wont get everything finished in time.  I apologise for the number of  pictures in this post, but I think you will understand.


The original idea for my card came from a very talented lady.  Her blog is called Mariannes Papirverden .  I am very inspired by all of her makes.  I actually followed a tutorial on YouTube to make this.


When closed, my card measures 3"x6"


The inner part of the card was made from one sheet of A4 which I cut down to size.  I will lay flat when fully opened.  I have used a version of this fold before as shown here.


The back needed something so I have stamped a lovely little bear which shows up on a lot of my Christmas cards.


This is the front of the matching bag I made for the card showing the same little bear.  The bag is made from one A4 sheet of the same paper I used inside the card.


And the back.

I will  be entering my project for the following challenges:
Christmas Stamping All Year Long - Fancy Shmancy Folds
Crafty Creations - Dies and Punches
Creative Card Crew - Anything goes
Die Cut Dreams - Make a gift bag or box

Saturday, 20 August 2011

Thank you brightly

I'm still working on less is more, so this weeks challenge at Charisma cardz was perfect.  They asked us to use no more than a third of the card.  I think I managed that :-)  


Just Us Girls set us a colour challenge. Black, red, yellow and green.  I have used Doodlebugs la-di-dot cardstock which has velvet flock and looks and feels very lush.  As soon as I saw those two challenges I got a clear picture in my mind for what I was going to make.

The faux stitching I have used fits in nicely with the stitch in time challenge over at Fab N Funky and the bold bright colours are good for the challenge over at One stop Craft.

The thank you stamp I have used on my card came free with a magazine,but it was the perfect addition for the challenge at Stamp something.

Saturday, 13 August 2011

Heart of Devastatia

Every now and again I like to try my hand at altering.  If you have been on my blog before, you may have seen one of my trinket boxes.  Well I made another one.  I love decorating these.


I'm loving Kenny K at the mo and his digis are featuring on a lot of my projects right now.  I love using intense colours.  They give any project a rich feeling.  This is Devastatia.  I have coloured her in red black and silver.


I have inked the box using Fired Brick distress ink, which I then went over with my heat tool to help set it. You get quite a good effect as you can still see the wood grain.  I might try adding embossing powder too next time.  Heating the ink changed the colour a little, but I still love the effect. I hadn't planned to use so many flowers, but once I got started, I just couldn't stop.


I have edged the top of the box with black velvet ribbon.  I have then edged around the bottom section with black lace and more black velvet ribbon.  I have added deep red gems for a bit of glamour.


 I am entering my trinket box for the following challenges:

Allsorts Challenge Blog - Anything but a card
CRAFT Challenge - Gift
Kaboodle Doodles - Primary colours
Papertake Weekly - Grow your own - use flowers

Tuesday, 2 August 2011

Wanda in Red

Hiya, couldn't resist making a card tonight.  If you look at my last post you will see some cheap jewelry that I bought a few days ago.  This is a bad picture of the silver studs that I bought for £1.


I had to make a hole with my pokey tool and then after I pushed it through the ribbon and the card I did my best to bend it down.  (Not as easy as I thought that would be).


I have used another of my new Kenny K digis.  I have used my sakura pens again to give the skulls in her hair and on her outfit a silver glitter finish and her lips are black glitter.  The sentiment is black peel offs and as you can see I have used one of my studs.


I'm entering this card for the following challenges:

Craft Your Passion - Anything goes
Moving Along With The Times - Brand spanking new - digi and earring
Kenny K - Metal embellishment - earring

Friday, 1 July 2011

Thank you rose

I haven't played with acetate for a while, so guess what I reached for :o)


Kanban do some lovely glittered acetates.  I haven't gotten round to working out how to print onto acetate yet, so this was a great find for me.


The pattern on this one is a bit too busy to add too much to it, so I have tried to keep things simple.  The acetate has been eyelet-ted into place in the four corners and 3mm ribbon added.  The ribbon fit in nicely with this weeks challenge at Craft Your Passion who asked us to use red.  Oh La La asked us to use summer flowers.  I figured the glitter flowers on the acetate fit the bill, but couldn't resist adding a red rose.

All in all, this card is quite a simple one, but the acetate is what really pulls it together.

I will also be entering this card for the following challenges:
Crafty Creations - Thank you
The Crafty Pad - Bold and Bright or Soft Pastel.  This is definitely bold

Saturday, 25 June 2011

Red and White

One of my latest discoveries is Teddybo digi stamps.  Love their stuff.

This week, One Stop Craft asked us to make a get well soon card.  It was the perfect opportunity to use one of my new Teddybo digis.  The colour combo is from this weeks challenge at Charisma Cardz who asked us to use white plus one other colour.


Moving Along With The Times asked us to make something clean and simple.  I usually struggle with simple cards because I always want to add more, but this one was surprisingly easy to make. The red ribbon made this card perfect for the ribbons and bows challenge over at A Spoonful of Sugar.

Sunday, 27 February 2011

Flower Shower

I love trying out new techniques and ideas.  I have found Google images and looking at blogs is a great way to get inspiration.  I still have to work out what they did and how, but then I can put my own twist on it.  Right now I am loving the look of the twisted easel cards and I plan to make one as soon as I figure out how they are made.  I have also seen some variations on the tri-fold card that I want to try
 

Any way, this card is a variation on an easel card with just the middle popping up.  The remaining card from the the top of the card have been stuck down to form part of the base. 


This card was made using a whole sheet of A4 card folded in half plus most of a sheet of 12 x 12 paper, some lace and some trim.  I had to use additional card to make the front of the pop up section of easel and of course there is the stamped image and sentiment.  I have added creamy pearls to the center panel and and black pearls to help keep the pop up in place.


The whole card does lay properly flat, but I had trouble getting a photo :0)

I am entering this card for the following challenges:

Stamp Something - Something with flowers
One Stop Craft Challenge - Spring Flowers

Sunday, 5 December 2010

Xmas Vintage

Now I'm not really sure what I am doing when it comes  to vintage, but I love to have a go.  This is my first card for a while and it was so good to do some crafting for a change.


I went with a red green and cream theme as, to me, these are classic Christmas colours.  I bought the decoupage boy last Christmas and the papers were my one paper treat to myself this year.  I have 3 drawers full of paper and have promised myself that i will use some up before I buy any more.

I am entering this card for the following challenges:

Allsorts Challenge Blog - Light up the night.  The little boy is carrying a candle lamp
My Time To Craft - Vintage Cards
Saturday Challenge - Christmas

Wednesday, 27 October 2010

Box of Love

One of my new years resolutions this year was to try to learn new crafting techniques each month and to push myself.  I've decided to try making gift boxes.

I like things that are a little bit different so this one doesn't fasten at what you would assume is the top of the box.


This box is made from one sheet of A4 thick card.  We had a photo inspiration challenge over at Everybody Art so I have taken the red and black colour scheme from there.  The card was originally black and white, so I have coloured a few of the hearts and squiggles in red to lift the pattern a bit.


I've used a circle punch to cut a notch near the opening and a corner punch on the flaps of the box.  I have added gems for some sparkle and a die cut chip board heart from last years stash.  The little flowers were originally  lilac, but I held them against my fired brick ink pad until they picked up enough colour to use.


I have eyeletted the two flaps and attached red ribbon to tie the box closed.  I don't actually have a use for this box yet, but I had one of those moments where a challenge puts a picture in my head and I know what I want to make for it.

I will also be entering this one for the Die cuts/ Punches challenge over at A spoonful of sugar.

Sunday, 3 October 2010

Hidden Message

This one is a traditional red and green Christmas card with a twist.

I'm still using up last years stash.  The papers used on this one are all form the Daisy and Dandelion "Christmas Collection - A winters tale" paper pack that I bought last year.  I loved them so much that I bought 3 pads.  I ran out of crafting time before Christmas, so there is still some left over for me to use now.


My apologies for the quality of the pictures, but I had problems with getting the lighting right.

The image is a stamp from Penny Blacks "Jolly Follies" collection.  I have added glitter glue for snow and have added a few star shaped gems.  This is my first attempt at one of these cards.

I am entering it for the following challenges:

Creative Inspirations - Christmas in September
Paperplay Challenges - Hidden Extras

Saturday, 2 October 2010

Three Bears

Have you ever seen a sketch and been immediately able to see in your head how the finished item would look?  This card came from one of those sketches.  I got it close to what I imagined and I'm quite pleased with it. Thank you JUGs.


 This stamp has featured on quite a few of my Christmas cards this year.  I think it's so cute.  It was a freebie on a magazine last year and has had plenty of use since I got it.  I have edged the die cut circles in worn lipstick distress ink and have added silver string to the back of each to create the look of Christmas tags.  All three of them have been attached using 3D glue dots to give them a slightly raised effect.


I will be entering this cards for the challenge over at A Spoonful of Sugar - who asked us for spots and stripes and for the challenge at SCSC who asked us for an easel card.

Thursday, 23 September 2010

Jolly Xmas

I've been wanting to make a stair step card again for ages.  This time I went for the traditional red and green, but I wanted to use them in a non-traditional way.  The basis of the card is red mirri board and I have raided the scraps drawer for the black and green papers.


I have punched silver and red snowflakes and stuck them onto black buttons.  I've had the reindeer topper since last year.  It is one from a pack that I bought in the pound shop last year.  I'm finding lots of great stuff in my stash.

This card will be entered for the following challenges:
JUGS - Green Red and Black
A Spoonful of Sugar - Anything goes
Papertake Weekly - Animal Magic

Monday, 24 May 2010

Glamour in red

Long time no blog. College is out of the way, so hopefully I will be able to get more crafting done.

I love working with acetate, so finding glitter embossed actetate by Kanban required me to sit down for a minute ;-). I spent the train ride home working out what I was going to do with my new buy. I'm ashamed to say that no one got much attention from me for a good hour after I got home from work tonight. Sorry boys x.


I had to adjust the card a bit from the original idea as I got home to find out that I had run out of black eyelets. (More craft shopping needed..... oh the pain he he he).


I started with coordinations cardstock which is black on one side and red on the other. Perfect for this make. I have left a one inch over hang to attach the acetate to. the acetate is held in place with two red eyelets and a ribbon. the charm was taken from a necklace which I mentioned in an earlier post.

The sentiment has been attached with foam pads so that it stands proud and I have added an extra piece of red card on the inside to cover up the pads.

I am entering this card for the following challenges:
Die cut dreams - Words only, No stamped images
CRAFT Challenge - Birthday / Celebration
Ooh La La - Bright and cheerful

Saturday, 13 February 2010

Birthday Boy

My baby brother turns 13 in a few weeks. I knew which image I wanted to use on his card, but couldn't decide on the colour scheme or the design. Whilst I was rooting around in my stash to make my last card, I came across some red dotty paper and some black dotty ribbon. PERFECT.


I am really happy with how the card turned out, but if I use this design again, I will use a patterned paper for the back ground. Lets call this one the minimalist version lol.

Paperplay Weekly asked us to make a card for someone special, so it as the perfect excuse to start this one. I am also entering this card for the "Digi stamp" challenge over at CRAFT challenge and for the "Male card" challenge over at Charisma Cards Challenge. I think I am starting to get the hang of this male card stuff. ;0)

Saturday, 16 January 2010

Ditressed Gold


Another Mothers day card. I wanted a distressed look for this one. Nothing too clean cut, but still with (I hope) a touch of elegance.

I have used cream ribbed writing paper as my backing paper. I have coloured the poem using distress inks (antique linen and aged mahogany) to try to get a colour that is like rose petals and matted it onto dark red textured card.

The gold ribbon is from the wrapping of a Christmas present I received and I have added a gold heart charm and a gold gem at the top.

I used the Krylon 18KT Gold leaf pen to distress the edges. I hope I didn't over do it lol. I am entering this card for this months challenge over at Bizzy Becs

Sunday, 10 January 2010

Precious Metals


This is the first of three Egyptian style cards that I made this weekend (all three can be seen on my other blog) and I think that this is my favourite. It is quite a simple card, but I think that it is effective.

It was made using a 5"x7" card blank, but I feel that it looks wider with the placement of the topper. I folded the front of the card in half to create a thick "spine" to add a bit of depth.

This style of topper is out of my comfort zone, but I enjoyed using it. Normally I tend to stick to cute cards. This is a more adult look I feel. I'm not sure that I will ever get into vintage, but it is also on my list of things to try this year.

This card was inspired by the precious metals challenge over at Paperplay Challenges


Thursday, 19 November 2009

Manga Xmas

The Sugar Bowl gave us a gorgeous sketch to work with. I've been commissioned to make a couple of Christmas cards for teenagers and the ideas I got from this sketch was perfect.


I have used Manga Girl #2 and coloured her black and red to match the rest of the card. She is matted on black textured card which is matted on silver mirri board. I used white glitter for her hair instead of colouring it in. It's a pity I couldn't get the lighting right to show the sparkle.

Light snow

MAWTT gave us a sketch to work with this week. It is nice and simple in design and will definitely get used again by me in the future with a few adjustments.


I got the stickers as part of a Docrafts pack and could never figure out what to do with them. As soon as I saw this weeks sketch I knew just what to reach for. I have backed the stickers onto silver mirri board and then used textured black card stock mounted onto red textured card stock to finish it off. I think the red board really brings out the colour of the robin.

Related Posts Plugin for WordPress, Blogger...