Pages

Sunday, 2 June 2013

Bird house

Do you ever get an idea in your head that just wont budge till you make it?  This was one of those makes.

Late warning.  There are lots of pictures.


The bird house measures approx 6x6x6 inches and is made from 480 gsm card stock.  I have drawn out a cutting guide as I will doing a live tutorial on how to make this soon.


The hardest part for me to work out was the roof strangely enough.  The best part was decorating it.


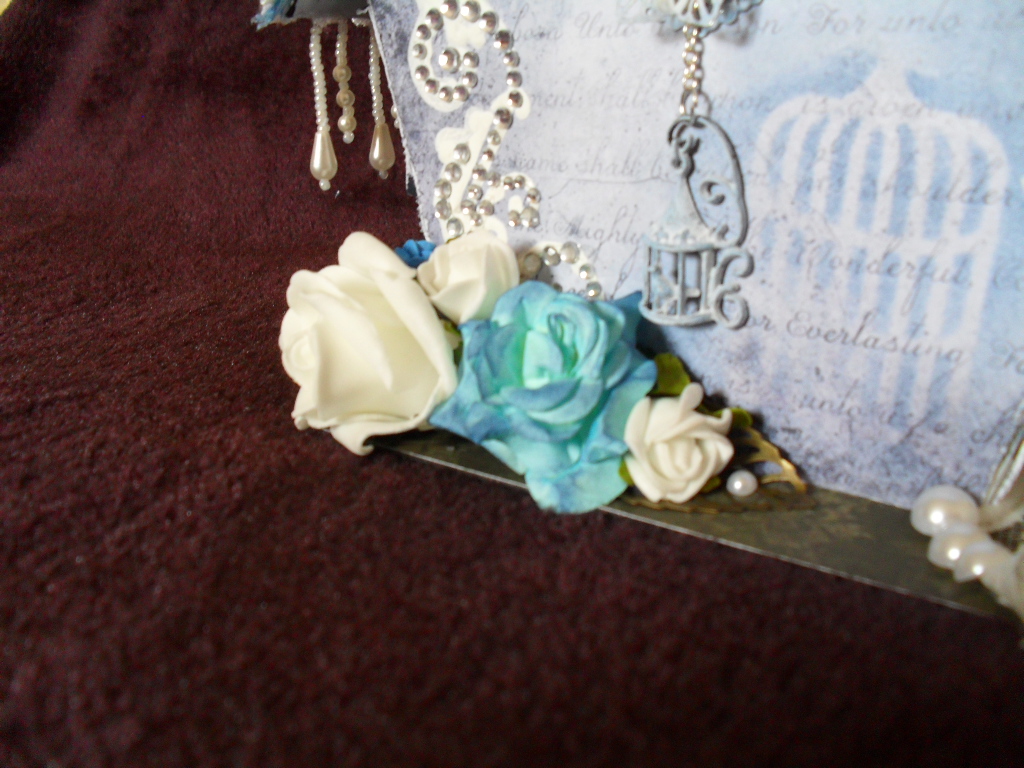
I have stencilled, texture pasted, dyed flowers and generally had a lot of fun with this.


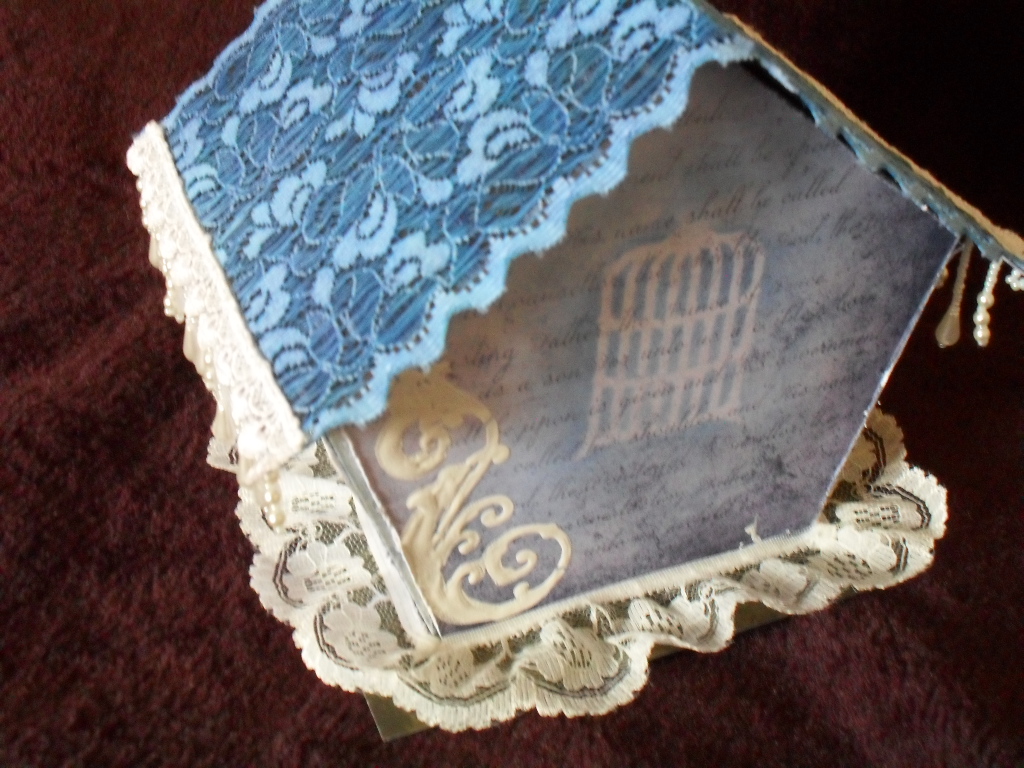
I couldn't resist adding more flowers to the roof.  I felt it needed a chimney, but preferred the flower cluster.


I did cover the base, but then added lace for a bit more femininity.


I plan to make a mini album to go inside the house, but I just couldn't wait to show it off.

I am entering my Bird House for the mixed media challenge over at Seemacrafts

Sunday, 5 May 2013

Owlie

Hi,

I have joined a few crafting groups on Facebook in an effort to get me crafting more and to be able to swap ideas.

This is something I made for two of the challenges in the groups.


This started life as a page from a 7 gypsies tag book that I have had for a couple of years and didn't know how to use.  I had originally tried to cut it down to 6 inches using my guillotine and messed  it up.  Who knew that it wouldn't cut chipboard.  I wont be trying that again.  Any way, I couldn't use it for that project and made this instead.


The background started life as a piece of white card stock, which I inked and masked using distress inks.  I also went around the edges with some mica powder to add a bit of sparkle and a slightly distressed look. (Looks better in real life.)  Every thing else came from my stash.  I'm trying not to hoard and any more, so bits I have been saving are starting to come out.

I really need to craft and blog more.

Any way, happy crafting xx 

Saturday, 20 April 2013

Wallet albums

Hi.  I haven;t been crafting as much of late.  My plans for opening my own craft shop have slowed down and my mojo went some where sunny to relax.

Last year I made a wallet mini and I have been meaning to make another.  I finally got around to it this week and immediately got asked by my son to make him one.


This is the original one that I made using a tutorial by Charliejones2686 on Youtube.


This is the one I finished earlier this week.  It's hard to show these properly in pictures because of the size and the number of flaps to open and display.

My sons favourite colours are black and purple, so I have started making his using black card.  I am going to make his pages white and distress/grunge them with black and purple.  The odd bit of silver might get added here and there. I'm hoping to finish it by tomorrow, so I will blog it when it is done.

Catch up with you soon (I need to blog more often)

Naomi x

Tuesday, 5 March 2013

Smile Often

A friend of mine gave me two of these canvases and I sat starting at them for ages.


Then I started watching Youtube and came across what I now refer to as "Full up" canvases such as Luvleescrappin  and Finnabair make (The links will take you to Youtube)


This is a picture of my daughter from years ago.  I created some texture using a couple of stencils and texture paste.  When the texture paste was dry I started adding the other elements.  After sticking everything down I covered the picture with a coating of matt gesso and the rest of the canvas with gesso.  I then sprayed with mica mists.  I went over some of the elements with watered down vintage photo distress ink re-inker to add definition.  I added some blue embossing powder to the peacock and butterfly

The great thing about doing a canvas is that if you don't like a little bit you can gesso it and recolour.

I am entering my canvas for the WINGS challenge over at Crafty-emblies as I have used a number of their lovely embellishments on this. 

Saturday, 16 February 2013

New challenge.

This year I am determined to be more in control of my destiny. I am currently working on a business plan that will hopefully allow me to open my own shop.  I plan to sell crafting goods suitable for card making, scrapbooking, mini album making and altered crafts.

I will run classes in all of the above and hopefully at some point set up a website that I can sell from.  2013 is going to be MY year :D

Monday, 28 January 2013

2013

I'm determined to push myself with my crafting this year.  I tried out a number of different skills last year, but didn't take the time to think them through properly or to perfect them.  This year will be my year to improve on what I do.  For the most part, I think this will mean more time planning.  I love to play and explore, but I wasted a lot of stash (and money) last year and I can't afford to do that any more.

I have found new inspiration though groups that I have joined online and via blogs and Youtube.  I haven't really been using my blog very much and as a result, I have missed out on some great posts and ideas that are out there. YouTube
Mixed media excites me. I can't draw, but I recently bought a sketch book.  I'm hoping to try art journaling with that.  I'm loving working on canvas, but that needs a major amount of work as what I am producing at the moment is very amateurish. I have discovered  Jim and have been so inspired by the 3D pieces that he produces.  I'm hoping that my imagination can take me further than it ever has before and that one day I will be able to produce pieces along the lines of what he has made.

I'm learning to take lots of pictures so that I can recreate ideas with less going wrong, so expect to see a lot of that going on.

I'm off to do dinner and then have a crafty play time 

x

Friday, 9 November 2012

Such a long time

It has been ages since I have posted anything on here.  I have been busy doing stuff in RL, but I have found time to do a fair bit of crafting.

I have finally put he handle on this one.  I'm so pleased with how it turned out.


This started life as a pale wooden (pine I think) tea box that I bought on eBay.  I started off by staining it using Tea Dye distress stain.  Tea dye is my favourite colour in the distress range.  It gets used on almost every thing.

I then stamped it all over using vintage photo distress ink and a Tim Holtz script stamp.


I seen to have a thing about time lately.  Lots of cogs and clocks appearing on everything.  I love any thing that smacks of steampunk (NOT just sticking a cog on it) so I had a dig through my collection of steampunk charms and embellies.


I have added a few stamped clocks using brushed corduroy   The cogs and clocks where coloured using tea dye, vintage photo, aged mahogany and a bit of bronze acrylic paint.


A friend of mine gave me some stamped images.  This heart seemed to beg to go here.  It covered the seam of the box, so I had fun with a scalpel cutting it so that the box would still open.

I have another three projects on the go, so hopefully I will be posting again soon.

Happy crafting every one.

Sunday, 9 September 2012

Diary of a wedding album

WARNING contains lots of photos and may be slow to load.

I have been commissioned to make a wedding mini album for a civil partnership.  In my eyes this is a wedding so that's what I will be calling it.  I haven't been given a budget, but I know the person who ordered it doesn't have much in the way of spare cash, so I won't be getting too extravagant with what I put in it.

I have decided that I will keep a diary in words and pictures of what I make.  The album is for Nick and Richard and the colours they have gone for are pink and lilac.  My first reaction "PANIC"  how do I make an album in those colours with out it turning out girly.  Then I started thinking.  I only do grunge these days.  I have nothing romantic or weddingy.  Time to go shopping.

I lucked out with the shopping.  There was a major craft show (lots of retailers) at Glow, Bluewater so off I trotted with my deposit clutched in my hand and a couple of friends to help with their opinions.


This is what I bought.  20 sheets of printer or embossed A4 cardstock, 20 sheets of lilac crush lightly textured cardsock and 10 sheets of liquid silver cardstock.  I also bought silver corner peel offs, lots of flat backed pearls and gems, 3 silver filigree hears and a few other silver charms.  I also bought 6 reels of red tape (hope that's enough), some stamps and some pink ribbon.

I have been asked to make an 8x8 inch album with 10 pages (sides) not including the front and back covers.

Step 1.
Have a cup of coffee while planning out the pages.  I actually did this before I went shopping so that I would have an idea of what I needed to buy.  That all went out of the window when I got to the show and couldn't find suitable 12x12 cardstock which I had used in my plans.   End result was 20 sheets of A4 in the hope that that will cover it.

Step 2
Lightly sand the edges of the chipboard if they are a bit rough.  I find that sometimes there are Little bits that need sanding off where the chipboard has been cut.


Step 3
Paint the edges and an inch or so around the rim of the chipboard.  I use ordinary emulsion for this or acrylic.


Having spent time getting everything coordinated and looking good, the last thing you need is bits of grey chipboard around the edges of your pages making it look bad.  Normally I do this using black paint, but today I have gone with candy pink to match the colours in the album.

That is a far as I have gotten so far.  I will be editing this post as I go along rather than adding new ones for continuity.

Back again.

I have realised that this is reading more like a tutorial than a diary so I will keep going in that style telling you if anything went wrong along the way.

Step 4
Measure .75 inches from the edge and lightly pencil a line.  This will be your guide when you are doing your binding.  You will need to do it on both sides of the chipboard being careful to make sure that you stick to one edge.  Do this on all of your pages.


Step 5
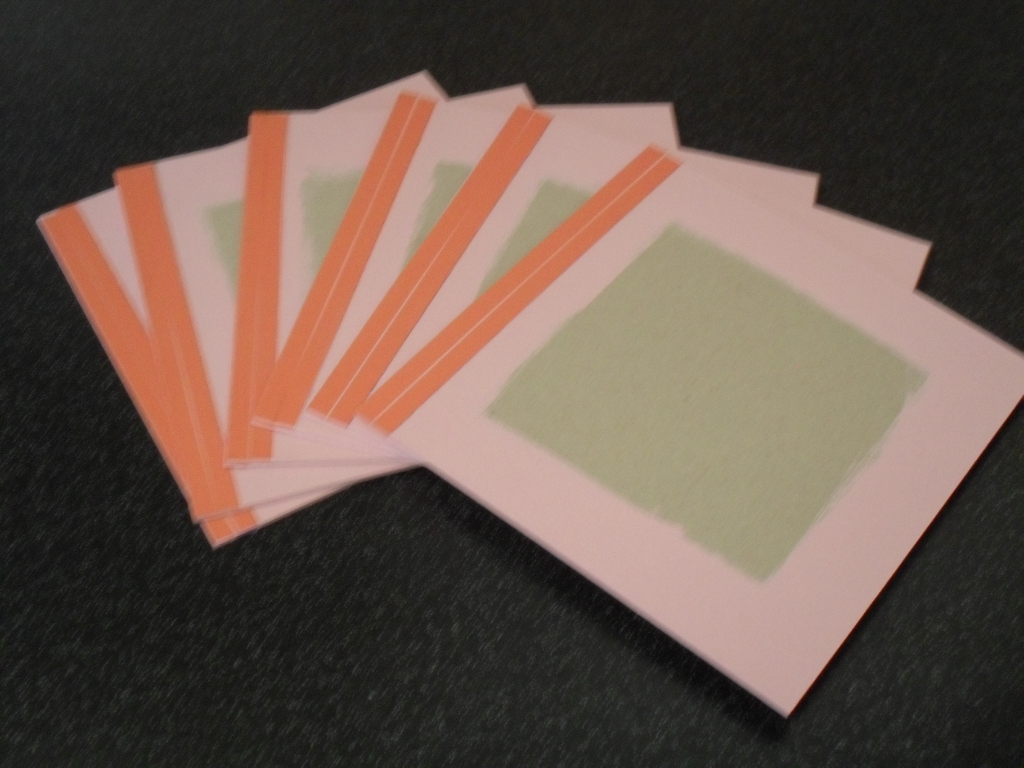
Next you will need to put Double sided sticky tape in the area between the line and the edge of the page.  I am using 9mm red tape  so I have used 2 strips per side.  Red tape is the strongest DS tape I have found to date.  Don't bother using a cheap tape for this bit or your binding will fall apart.  Believe me, I found this out the hard way and hot glue just didn't work.


Step 6
Now you need to make your binding.  I used 1 sheet of A4 lilac textured card for this as it will match with what I am using in the album.  I have cut my A4 sheet to just shy of 8inches wide.  This was a mistake.  It needed to be 8inches exactly, so I will have to see how it turns out at the end.  Next you need to cut your card so that you have 5 strips of 8x2 inch wide strips.  I have 6 pieces of chipboard to bind so 5 pieces of binding are needed.  Adjust the number to your requirements.

Because I am expecting my album to be bulky I will be making  a gusset so that it sits nicely when it is finished.  To do this I have scored at 0.75 inches and again at 1.25 inches and then folded.  See the picture below for how this will look


Step 7
Now for the tricky part.  Carefully line up your binding strip with the edge of your first page, firmly pressing down when you are happy with the positioning.   Carefully line up the second page and stick down so that you end up with 2 bound pages as you can see below.


As you can see from the next picture, you will have plenty of room to add embellishments and photos.


Step 8
Keep adding pages and binding until your whole album has been bound together.


Now it is time to make your pages and decorate with your embellies.  I always do my outer cover last.  this prevents it getting dirty or damaged while I do the rest.  One of the last things that will be done is the outer binding to cover up the spine.

Friday, 31 August 2012

Yummy candy

Crafty Emblies is giving away some great candy at the end of September.  Take a look and dont miss out.

Friday, 1 June 2012

Heart of diamonds

Here in England you can't escape the Queens diamond jubilee.  There are bunting and flags any where they can be stuck.  I wanted to avoid the red, white and blue that is covering everything right now and went for diamonds in a different way.


This started out as a box with a lid, but I didn't like the hinges or the way the lid fit, so I took them off.  After giving it a couple of coats of black paint I started gluing on the rhinestones.  I like the grain of the wood, so I haven't painted the inside of the box.    The ribbon that I added to the bottom edge is from my stash.  I'm always on the look out for ribbon and lace.

I will be entering my box for the following challenges:
Everybody Art - No cards
Anything Goes - Anniversaries - I have gone for a heart and diamonds to represent this
Creative Inspirations - Diamond - Lots of sparkle

Tuesday, 22 May 2012

Rivited

I'm a big Andy Skinner fan.  I'm new to mixed media crafting and don't have much of a stash yet, so I am still working my way up to doing one of his workshops.

This box it heavily inspired by one that he has made.  It's no where near as good, but I enjoyed making it.


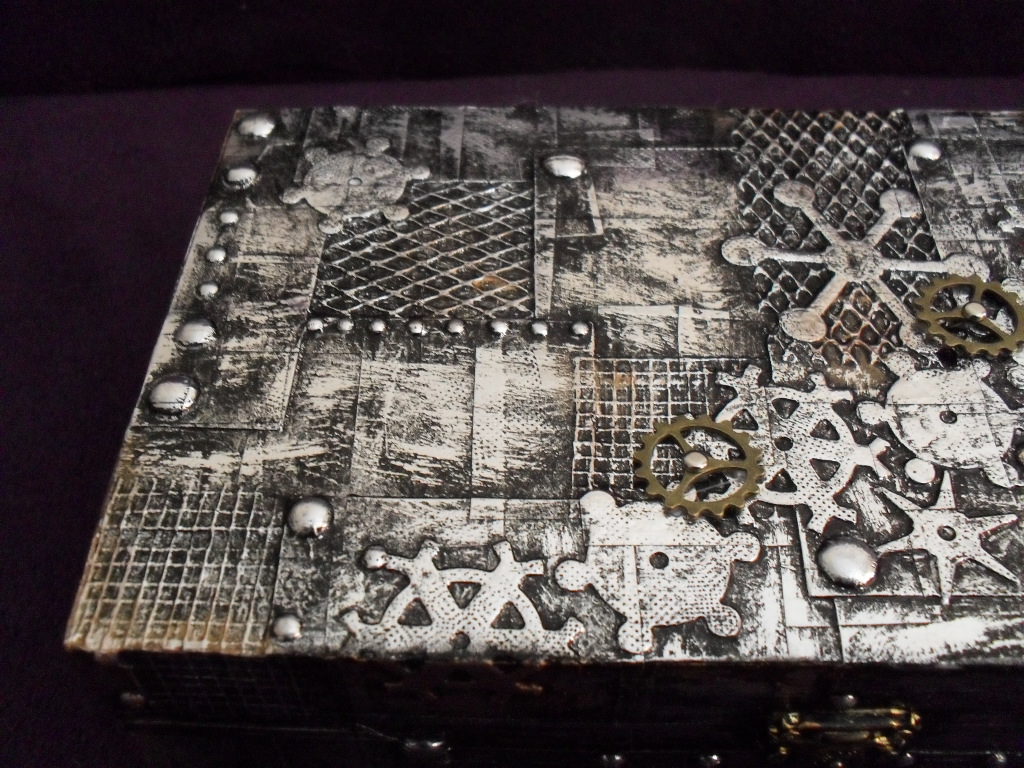
I started with a wooden box onto which I stuck a number of different textures and shapes and I then covered it with Idenden tape (yup, plumbers tape). This is a technique I adapted earlier this year having watched metal tape tutorials on Youtube. It isn't as thick as normal craft metal, but it is so versatile and cheap to work with.


I went for a grungy, dug it out of the basement look.  It's very easy to do.


All of the detailing is my favourite part of making these boxes.  I have used cogs both on top of the tape and underneath it.  I caught my eldest trying to turn the cogs, so I think i will try one with moving parts as soon as I figure out how.


I don't have a cog die yet so I am using build  a snow flake dies.  I love by bronze coloured cogs.  They are so easy to use.

I'm entering my box for the challenge over at The Craft Barn

Monday, 9 April 2012

What to do....

I really haven't blogged this year.  The reason?  I have discovered altered art, metel art and mixed media art.

I really can't get enough of them.  I'm so frustrated right now, because I don't seem to be able to co.  me up with any viable card ideas and I can't afford to buy the things that I need to do my new art form justice.

I will be blogging again. I need to be able to record my journey through my new creations.

Thursday, 12 January 2012

Golden Treasure

I'm so Excited.

I've been decorating heart shaped trinket boxes for a while, but this is the first chance I have had to decorate wooden boxes in new shapes and sizes,  My delivery came on Monday and I could wait to get stuck in.  Unfortunately, real life intruded and I have only been able to do a small amount each day.


This is how my box started out


I painted my Box with white acrylic, then roughly edged it with my gold Krylon leafing pen.  I have then stamped and inked with tea dye distress ink.  I had a fridge magnet that I wasn't overly fond of so i have taken the back off of it and removed the picture, created a new "face" for it and coloured it with my krylon pen.

To finish off I have used flowers, lace, stick on pearls, part of a broken necklace and some gems taken from an  old belt.  Lots of recycling on this one.


I can't wait to try another one of these.

I am entering this one for the following challenges:-
The Crazy Challenge - Lace and or  pearls
Fab n Funky - Recycle it
Everybody Art - Shabby
Crafty Creations - Something new
Creative Inspirations - Swirls and Pearls

Sunday, 1 January 2012

Happy new year

To everyone  in blogland, I wish you a year of great new ideas and projects.  May good health and lots of love be with you all xxxx

Naomi Dawn

Thursday, 17 November 2011

Crystal Butterfly

Hi everyone. I'm still making Christmas gifts.  I'm so far behind schedule I'm not sure if I will be finished in time.  All that aside, it's great to have an excuse to do some much crafting.


This is a new trinket box that I have made.  I love making these and they make such great gifts.  This one is hand stamped with fairy writing in faded jeans distress ink.  The tag was done using the same colour.

I have used an Anitas  dimensions butterfly as well as a die cut butterfly in silver and lots of 2mm clear crystals.  I love my flowers and the ones I get from Wild Orchid Crafts are great.


The blue ribbon matches the one I used on the tag and the cream lace works really well with the ivory flowers.

I am entering this trinket box in the following challenges:-

Everybody Art - Little present
My Time To Craft - Take two - I used two butterflies
One Stop Craft - Ribbons and lace


Monday, 14 November 2011

White Christmas

White on white cards are a scary prospect for me.  I've made white on white cards before, but it is always a struggle.  I quite enjoyed making this one tho.  I love this lace and Kenny K digis are so easy to use, this one just sort of came together.


This was a very easy make.  Cuttlebug embossing folders, Spun Sugar distress ink, some luscious lace and a few pearls.  I couldn't resist adding some iridescent glitter glue.


I am entering this card for the following challenges:-

Craft your passion - Let it snow
Crafty Catz - Use a digi
Fab n Funky - All white on the night
Kenny K Krafty Girlz - Emboss away
The crafty pad - White on white

Saturday, 12 November 2011

Flutteby Red

It has been a week or two since my last post as life has taken over my little bit of crafty time.  Luckily, I have been able to do a bit over the last two days.  I have a list of Christmas cards that I am making  along with presents for family members.  There just are not enough crafting hours in the day.  This little wooden box was made for fun, so no pressure :-)


I love doing these trinket boxes.  Exploring the possibilities of what I can do with them and what new techniques I can try.


This one is hand stamped using tea dye distress ink on the top and the tag.  I bought the fairy writing stamp a while a go for a project that I haven't gotten around to starting yet, so this is the first time I have used it.  I have also used the tea dye ink around the sides to add colour and heat set it.  The butterflies are embossed with gold embossing powder and I have added some 2mm gems.  This is the first time that I have tried using a tag on one of my trinket boxes and I am very pleased with the result.

I am entering my box  for the following challenges:-

Craft Your Passion - Anything goes + Brown
Kaboodle Doodles - Fall colours
The Crazy Challenge - Something with wings


Monday, 31 October 2011

Blue Christmas

I've been mainly focusing on making Christmas prezzies for friends and family lately, so I have not been making as many cards that I can blog.  I'm really pleased with the presents that I have made, but I can't blog them yet.

I have been experimenting with softer colours.  I like rich dark colours, but I am trying to branch out a bit with my style and colour choices.


Sorry about the picture.  I took it at lunch time today, but the weather is so gloomy at the mo and my camera is nothing special.  Please click on the image to get a better view.


I haven't used my Penny Black stamps in ages, so I pulled them out and had a play with one from the Holly Jolly set.  I like the cool icy colours in this card so I added 2mm gems and some ivory flat backed pearls and lots of glitter glue.

I am entering this card for the following challenges:-
Allsorts - Christmas Easel Card
Christmas stamping all year long - Jingle all the way.  I added a bell that does tinkle
Totally Papercrafts - Glitter it

Thursday, 27 October 2011

Stocking filler


I'm still working my way slowly through making Christmas prezzies for family and friends and making cards.  This is another one that I made.


You may have noticed that I love using Kenny K digis.  I can't get enough of them to be honest.  Since I worked out how to do male Christmas cards, I am having a hard time stopping :-)

I started with my normal 5x7 white card blank and covered the front with Curry by 7gypsies.  I then stamped "Seasons greetings" in a couple of rows down the front.  I embossed and sanded a scrap of co-ordinations cardstock that was left over from matting the image.  The wording I printed has been edged with fired brick distress ink and then stuck on with foam pads to give them a bit if height.

I  will be entering this card for the "Get Dotty" challenge at Kenny K's Krafty Girlz and the "Halloween/Fall" challenge at Kaboodle Doodles as I feel the warm colours I have used really suit that time of the year. 

Thursday, 20 October 2011

Christmas for two

Today's challenge for me was to make a monochromatic Christmas card.  I have to say that it was a toughie.  I couldn't decide which colour to use and then I saw the challenge at Paper Play Challenges.  They asked us to use black so that was that problem solved.  Just to push myself a bit further I decided to make a Christmas card for a couple.  I have seen them in the card shops, but have never made one myself.


I have to say that this card has been inspired by a number of challenges.  The monochrome theme came from Creative Inspirations and The Crafty Pad.  Distressing your edges came from Creatalicious Challenges and Embossing came from Charizma Cardz Challenges.

I have used a Teddybo digistamp and have added black gems and black ribbon.  I love all things Tim Holtz so I have used the Tim Holtz distressing tool and Black soot distress inks.  Is there anything that man can't do?
Related Posts Plugin for WordPress, Blogger...